by
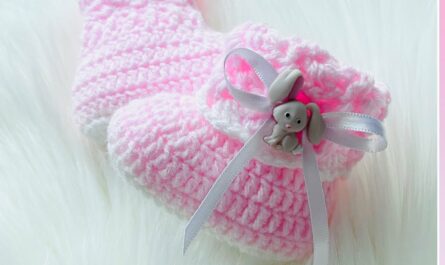
by Crocheting baby shoes is one of the most heartwarming and rewarding projects for any yarn lover. Whether you’re a new crocheter or a seasoned crafter looking for a quick and meaningful project, this super easy technique for making adorable crochet baby shoes is a must-try.
These little booties work up quickly, use very little yarn, and make perfect gifts for baby showers, newborn keepsakes, or even donation items. Best of all, you don’t need advanced skills — just a hook, yarn, and this step-by-step guide!

🌟 WHY THIS TECHNIQUE IS SPECIAL
- ✅ Beginner-friendly – uses only basic stitches
- ✅ Fast and fun – finish a pair in under an hour
- ✅ No sewing required (optional one-piece technique)
- ✅ Customizable – change colors, add bows, buttons, or straps
- ✅ Soft and safe for baby’s delicate skin
🧶 MATERIALS YOU’LL NEED
- Yarn: Soft DK (lightweight) or worsted cotton/acrylic blend
- Hook: 3.5 mm or 4 mm (E/4 or G/6)
- Scissors
- Yarn needle (for weaving in ends)
- Stitch markers (optional but helpful)
- Decorative button or bow (optional)

🐣 THE BASIC SHAPE: SOFT SLIP-ON BABY SHOES
These will be soft, cozy slip-on shoes, designed for babies aged 0–3 months. You can easily size them up by adding stitches.
🪡 STEP-BY-STEP INSTRUCTIONS
✨ STEP 1: CROCHET THE SOLE
We’ll start with an oval sole, crocheted in the round.
Foundation Chain:
- Chain 11 (for 0–3 months; add chains for larger sizes)
Round 1:
- In 2nd chain from hook, make 1 single crochet (sc)
- Sc in next 8 stitches
- In last chain, make 5 sc to curve around the end
- On the other side of the chain, sc in next 8
- Make 3 sc in the first chain where you began
- Join with a slip stitch
Round 2:
- Chain 1, sc in next 8
- 2 sc in next 5 (in the curve)
- Sc in next 8
- 2 sc in next 3 (second curve)
- Join with slip stitch
This gives you a flat, oval-shaped baby sole. Adjust stitch counts if needed.
🧵 STEP 2: BUILD THE UPPER
We’ll now crochet the sides upward from the sole.
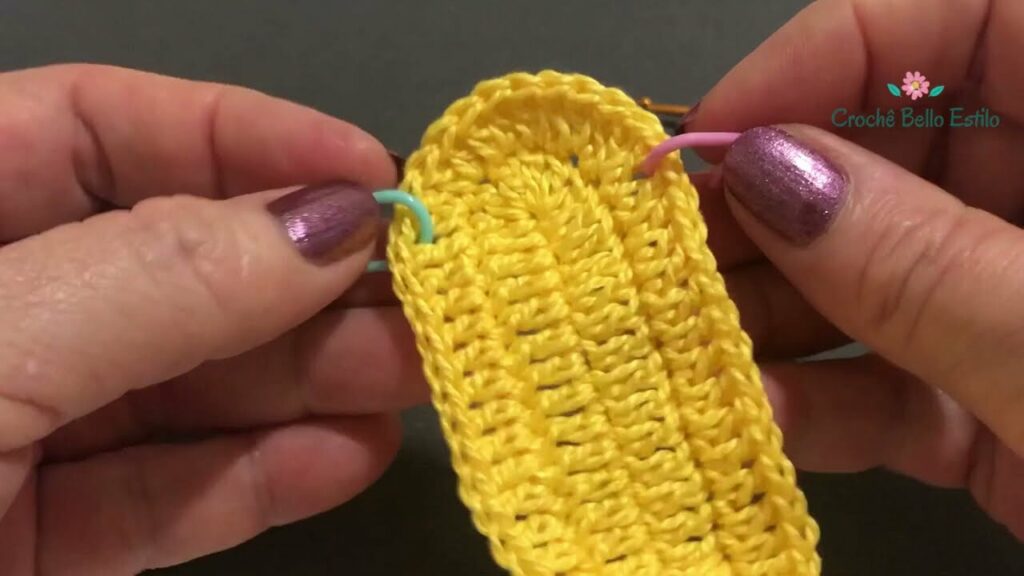
Round 3 (walls):
- Work in back loops only – sc in each stitch around
- Join with slip stitch
(This creates a “lip” around the sole.)
Round 4–5:
- Sc in both loops around
- Join each round with a slip stitch
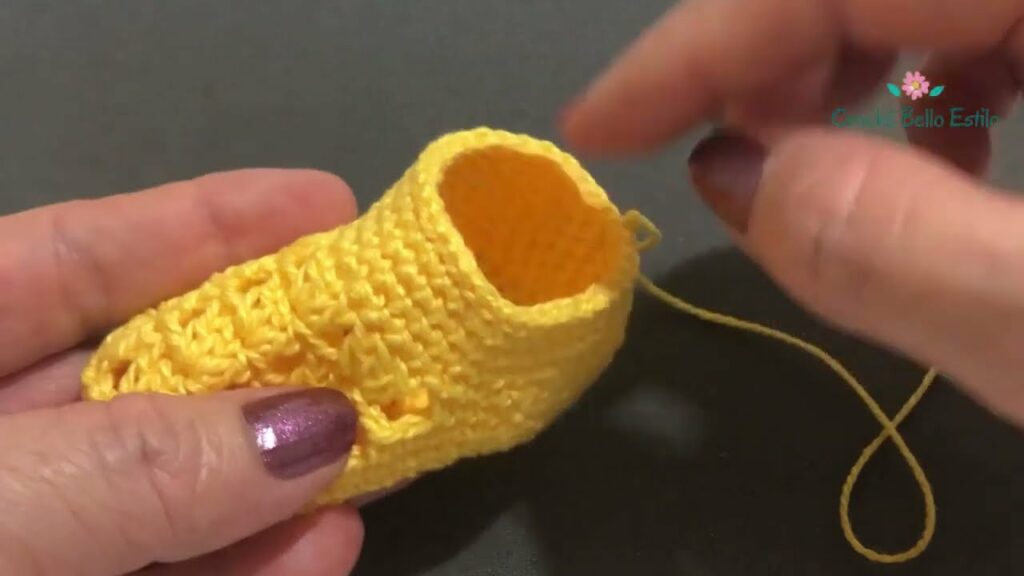
👣 STEP 3: SHAPE THE TOP (TOE SECTION)
Round 6 (start shaping):
- Sc around until you reach the front center (use marker)
- Decrease using sc2tog (single crochet 2 together) across 8–10 stitches
- Sc around the rest of the shoe
- Join with slip stitch
Round 7:
- Repeat the toe decrease (sc2tog across toe area)
- Sc around, join with slip stitch
Now the toe should be gently sloping in. Add a row if needed to bring it higher.
🧷 STEP 4: FINISH THE CUFF (TOP EDGE)
You can stop here for a simple slipper, or make a cuff:
Cuff Option (Optional):
- Chain 1, work 1 row of half double crochet (hdc) or double crochet (dc)
- Add a shell stitch or ribbing for extra flair
- Fasten off and weave in all ends
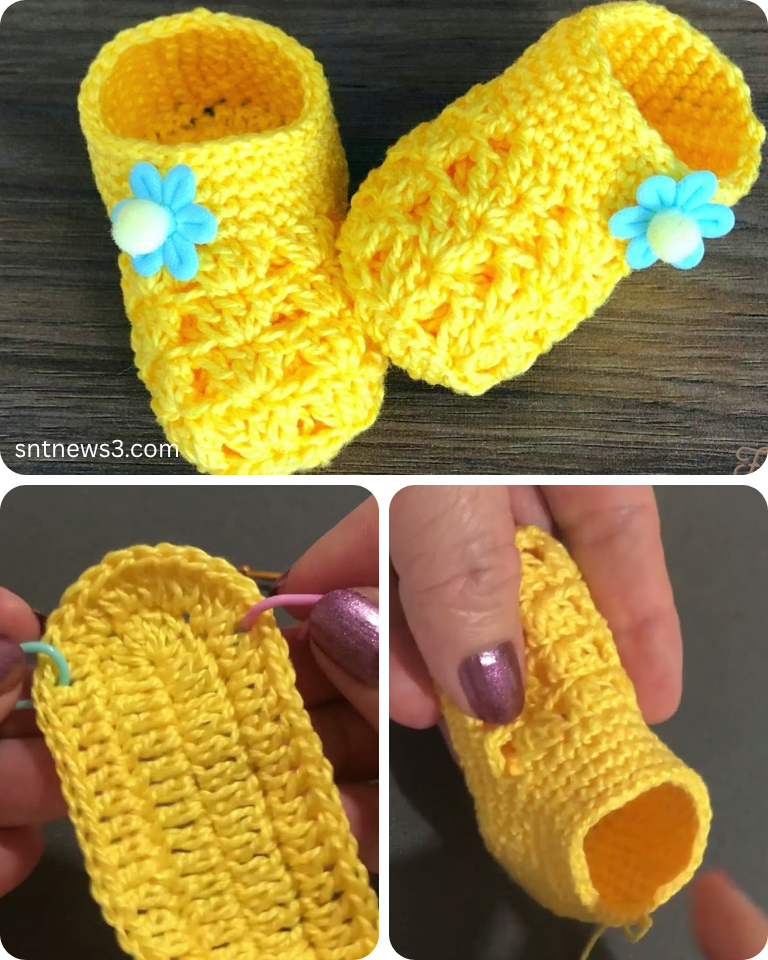
🎀 OPTIONAL EXTRAS
- Add a strap: Chain 10, sc back, sew ends on each side of the shoe
- Sew on a button (for looks only – avoid choking hazards)
- Make a bow: Crochet a tiny rectangle, cinch the middle, sew on
- Add a pom-pom or flower for extra cuteness
🧼 CARE & SAFETY TIPS
- Use soft, hypoallergenic yarn
- Avoid decorations that can come loose or be swallowed
- Hand wash in cold water, lay flat to dry
- Make sure shoes are snug, not too tight or loose
Video tutorial:
💬 FINAL THOUGHTS
This super easy technique for making crochet baby shoes is special because of its simplicity, speed, and the joy it brings. Whether you’re a new mom, a grandparent, or a friend crocheting from the heart, every stitch carries love. 💗
And remember: every pair of baby shoes you make is a tiny masterpiece!