 by
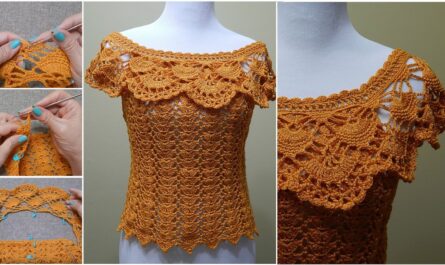
by Adding a crocheted edge to your projects is like putting a beautiful frame around a masterpiece. It’s the perfect finishing touch that can transform a simple blanket, a plain dishtowel, a cozy scarf, or even a piece of fabric into something truly polished and special. And the best part? It doesn’t have to be complicated!
This detailed, step-by-step tutorial will focus on super easy crochet edges that even beginners can master with confidence. We’ll explore the fundamental techniques for working into existing fabric or crochet, and then provide a few classic, straightforward patterns that will elevate your creations in no time. Get ready to add that professional and charming handmade touch!
Why Add a Crochet Edge?
- Polished Finish: Instantly makes any project look more complete and professional.
- Hides Imperfections: Can neatly cover uneven edges on fabric or the less-than-perfect starting/ending rows of a crochet piece.
- Adds Strength & Durability: Reinforces edges, making them more resilient to wear and tear.
- Decorative Element: Introduces color, texture, and pattern, enhancing the overall aesthetic.
- Personalization: A simple way to add unique flair to store-bought items or handmade gifts.
- Beginner-Friendly: Many edge patterns use only basic stitches, making them accessible to new crocheters.
Key Considerations Before You Start:
- Project Type:
- Crochet Project: You’ll be working into existing crochet stitches along the perimeter.
- Fabric Project: You’ll need to prepare the fabric edge (hemmed, or with holes poked) before crocheting.
- Yarn Choice:
- Weight: Match the yarn weight to your project. For blankets, use a yarn similar in weight to the blanket. For dishtowels or baby items, a finer yarn might be preferred.
- Fiber: Consider durability and washability. Cotton is excellent for dishtowels. Acrylic or soft wools are good for blankets and scarves.
- Color: Choose a color that complements or contrasts beautifully with your main project.
- Hook Size:
- For Crochet Projects: Use the same hook size you used for the main project, or one size smaller for a tighter, neater edge.
- For Fabric Projects: You’ll often need a smaller hook (e.g., steel hook) to initially pierce the fabric if you’re not pre-punching holes. Alternatively, a regular hook can be used if holes are pre-made.
- Tension: Consistent tension is key for a neat, even edge. Try to keep your stitches snug but not too tight.
Materials You’ll Need:
- Your finished Crochet Project or Fabric Item (e.g., blanket, scarf, dish towel, baby bib).
- Yarn for the border (matching or contrasting color and weight).
- Crochet Hook (appropriate size for your yarn).
- Yarn Needle (Tapestry Needle): For weaving in ends.
- Scissors: For cutting yarn.
- Optional for Fabric Projects:
- Fabric Awl or Large Needle: To punch holes in fabric (or use a sharp, small steel crochet hook directly).
- Embroidery Floss or Thin Yarn: If you want to make a preliminary blanket stitch edge.
Fundamental Step: Preparing the Edge (Vital for a Clean Finish!)
Before you start crocheting, you need to ensure you have a clean, stable edge to work into.
Scenario 1: Crocheting an Edge onto an Existing Crochet Project
This is the easiest scenario. You’ll be working into the perimeter stitches of your crocheted piece.
- Round Edges: If working around a piece that’s worked in the round (like a circle or square), simply work into the top of each stitch as you go.
- Straight Edges:
- Along the top/bottom (chain/final row): Work into the top of each stitch (or chain) as you would normally.
- Along the sides (raw edge of rows): This is where it gets tricky. You need to create an even number of stitches.
- Rule of Thumb: Work 1 stitch for every single crochet (sc) row, 2 stitches for every half double crochet (hdc) row, and 2-3 stitches for every double crochet (dc) row. Adjust as needed to keep it flat (not puckering or rippling).
- Corners: When you reach a corner, always work a (stitch, chain 1 or 2, same stitch) into the corner stitch or space to keep the corner neat and flat. E.g., (sc, ch 1, sc) or (hdc, ch 2, hdc).
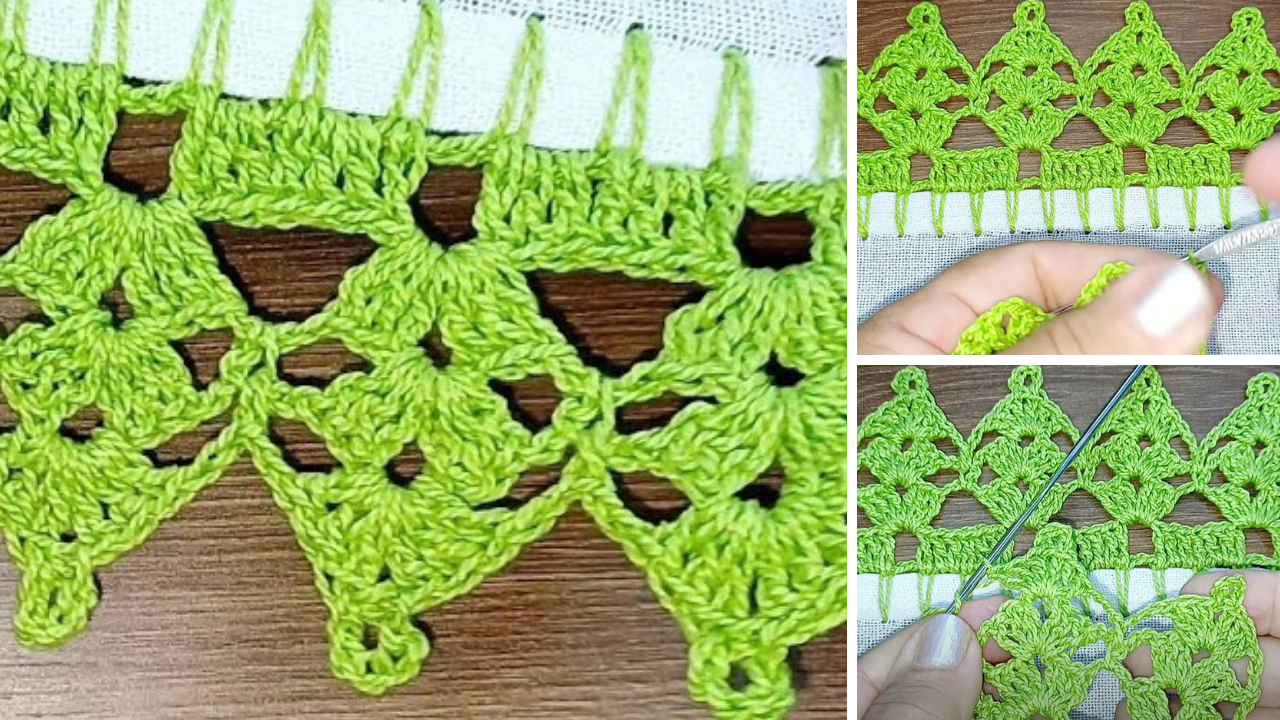
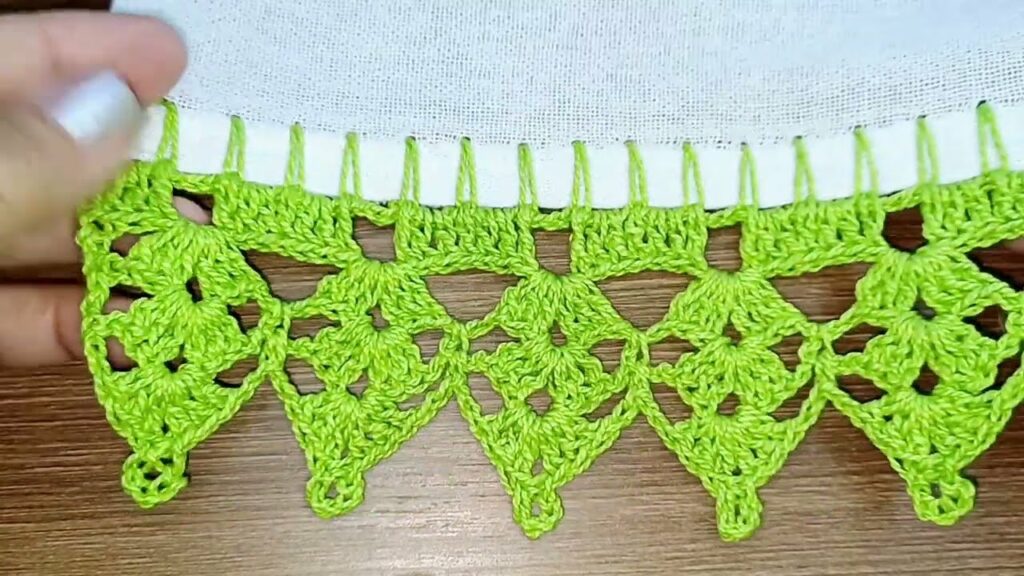
Scenario 2: Crocheting an Edge onto Fabric
This requires a bit more preparation to create holes for your crochet hook.
- Option A: Hemmed Edge (Recommended for Neatness):
- Hem the Fabric: First, hem the edge of your fabric. This creates a clean, durable border. Iron it flat.
- Mark Holes (Optional but Helpful): Use a ruler and a disappearing fabric marker to mark evenly spaced dots (e.g., 1/4 inch or 0.5 cm apart) just inside the hem.
- Punch Holes (Method 1): Use a fabric awl or a large, sharp needle to pre-punch holes at your marked spots. This makes crocheting much easier.
- Pierce with Hook (Method 2 – for sturdy fabrics/steel hooks): If you have a very sharp, small steel crochet hook, you can often push it directly through the fabric to make a hole as you go. This requires more force and can be harder on your hands.
- Option B: Blanket Stitch Foundation (Recommended for Decoration & Ease):
- Hem the Fabric: Hem your fabric as above.
- Work Blanket Stitch: Using embroidery floss or a thin, strong yarn and an embroidery needle, hand-sew a blanket stitch along the entire edge of your fabric. Aim for evenly spaced stitches. This creates a neat, decorative foundation that’s easy to crochet into. You’ll simply insert your crochet hook under each blanket stitch.

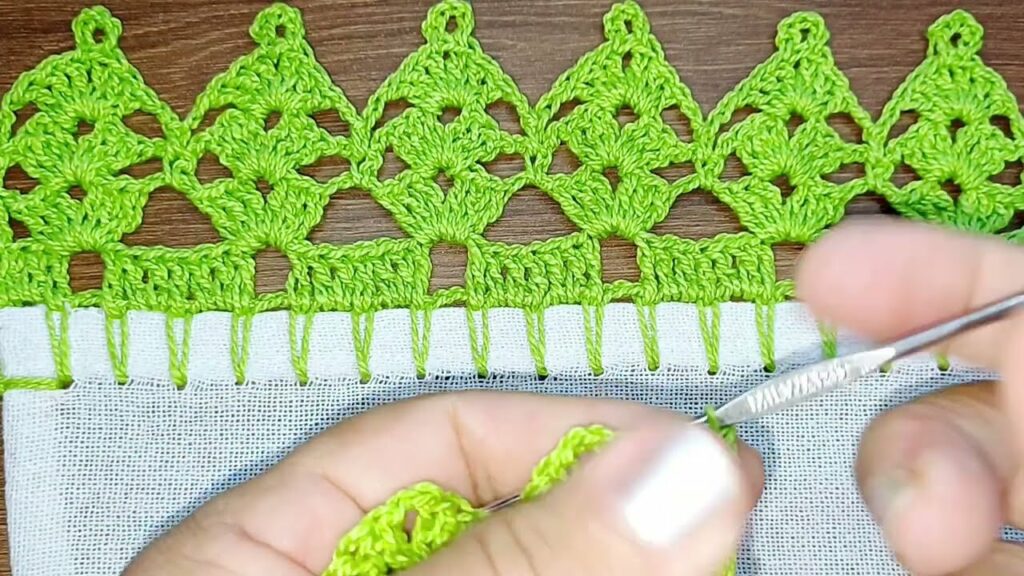
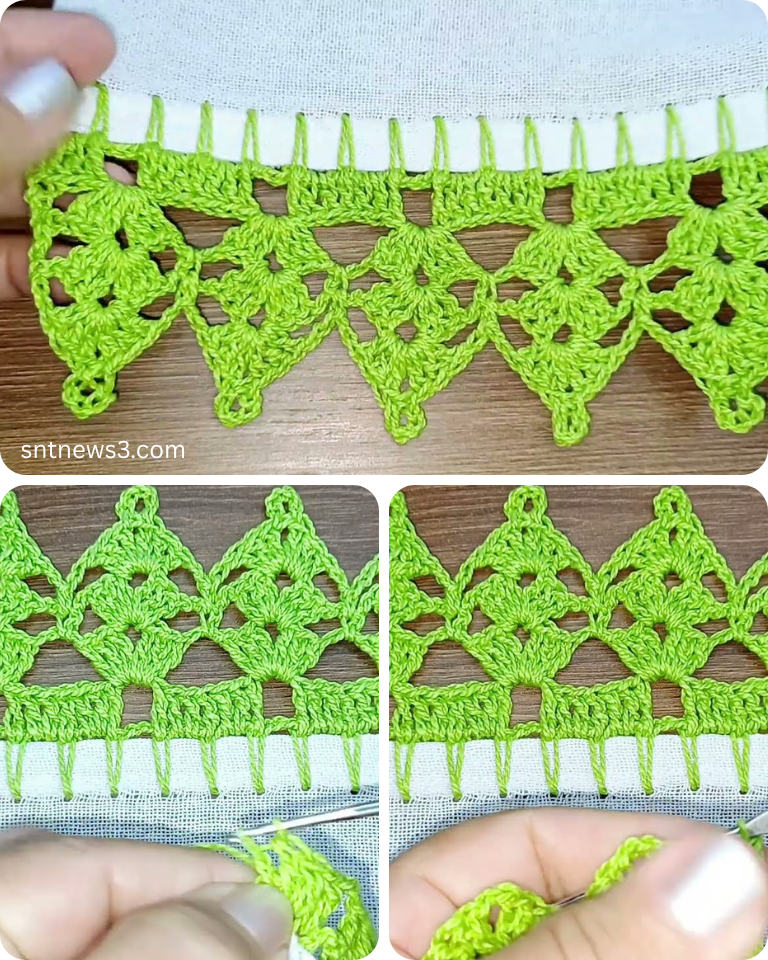
The SUPER EASY Crochet Edge Patterns (Step-by-Step)
Once your project is ready, you’ll always start by attaching your yarn.
- Attach Yarn:
- Insert your hook into a stitch (for crochet) or a prepared hole/blanket stitch (for fabric), preferably in a corner or inconspicuous spot.
- Yarn over and pull up a loop.
- Yarn over again and pull through the loop on your hook (this is a slip knot).
- Ch 1 (this secures the yarn and acts as your first stitch in some cases).
Edge 1: The Simple Single Crochet (Sc) Border
This is the most basic, yet incredibly effective, edge. It creates a neat, sturdy line.
- Round 1: Ch 1 (does NOT count as a stitch unless specified by pattern).
- Sc in the same stitch/hole where you attached yarn.
- Sc in each stitch/hole around the entire perimeter of your project.
- Corners: When you reach a corner, work (sc, ch 1, sc) into the corner stitch/hole.
- When you reach your starting point, sl st into the first sc of the round to join.
- Fasten off and weave in ends.
- You can repeat Round 1 for a thicker, more pronounced single crochet border.

Edge 2: The Easy Picot Border
This adds a lovely, decorative “bubbly” effect, perfect for baby items or anything needing a sweet touch. It uses single crochet as its base.
- Round 1 (Foundation): Work a round of simple single crochet (as described in Edge 1). Join with a sl st.
- Round 2 (Picots): Ch 1 (does NOT count as a stitch).
- Sc in the first stitch.
- Sc in the next 2 stitches. Now make a Picot: Ch 3, sl st into the first of those 3 chains (or into the top of the sc just made).
- Repeat from * to * around the entire perimeter.
- Corners: When you approach a corner, try to make a picot exactly in the corner stitch for emphasis. Adjust the spacing (e.g., sc in 1 st before picot, then sc in 1 st after) to make it work.
- When you reach your starting point, sl st into the first sc of the round to join.
- Fasten off and weave in ends.
- Adjust spacing: You can place picots every 3rd sc, every 4th sc, etc., depending on how dense you want them.
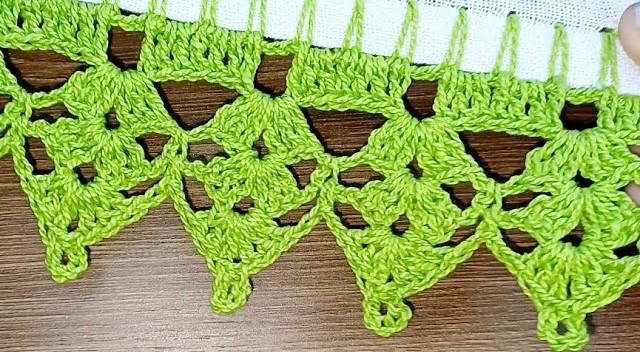
Edge 3: The Simple Shell Stitch Border
This creates a lovely, scallop-like edge using basic double crochet stitches.
- Round 1 (Foundation): Work a round of simple single crochet (as described in Edge 1). Join with a sl st.
- Round 2 (Shells): Ch 1 (does NOT count as a stitch).
- Sc in the first stitch.
- Skip 2 stitches. Work (dc 5) all into the next stitch. (This creates one shell).
- Skip 2 stitches. Sc in the next stitch.
- Repeat from * to * around the entire perimeter.
- Corners: Try to land a full shell (dc 5) right in the corner stitch for a nice effect. You may need to adjust the “skip” count slightly before/after a corner to make it work evenly.
- When you reach your starting point, sl st into the first sc of the round to join.
- Fasten off and weave in ends.
- Adjust shell size: You can use (dc 3) for smaller shells, or (tr 5) for larger, more dramatic shells.
- For a larger project, you could start with a round of hdc or dc instead of sc for Round 1 to build height faster.

Finishing Your Edge:
- Weave in All Ends: This is crucial for a professional look. Use your yarn needle to neatly weave all starting and ending tails into the stitches, making them invisible.
- Blocking (Optional but Recommended): For a truly pristine edge, especially on fabric, a light blocking can make a difference.
- Gently mist the crocheted edge with water (or lightly steam it).
- Gently tug and shape the edge to lay flat and even.
- Allow it to air dry completely.
Tips for Success with Easy Crochet Edges:
- Practice Swatch: If you’re unsure, make a small swatch of your project or a piece of scrap fabric and practice the edge before committing to your main project.
- Even Stitch Count: When working into fabric, ensure your initial holes or blanket stitches are as evenly spaced as possible. This makes your crocheted edge much neater.
- Start with a Base Round: For many decorative edges, starting with a plain round of single crochet (as in Edge 1) as a foundation can make subsequent rounds much easier to work into and result in a tidier finish.
- Don’t Pull Too Tight: Work your edge stitches with consistent, but not overly tight, tension. If it’s too tight, your project edge will pucker. If it’s too loose, it will ripple.
- Experiment! Once you’re comfortable with these basic edges, don’t be afraid to try combining them or exploring other simple stitch patterns for a customized look.
Video tutorial:
Adding a crocheted edge is a simple yet powerful way to elevate your handmade items. With these super easy techniques, you’ll be framing your creations with beautiful, personalized borders in no time! Happy crocheting!