 by
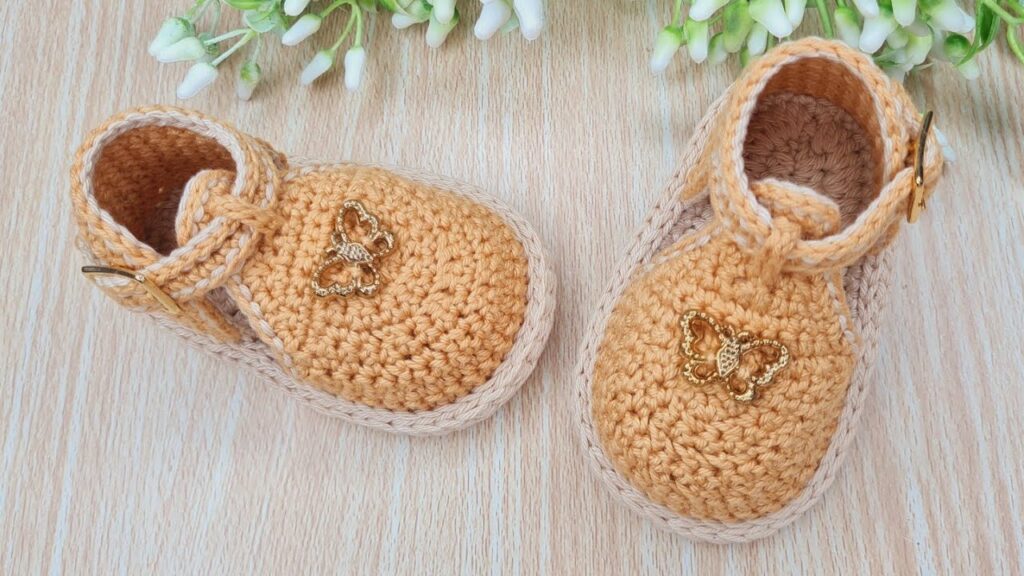
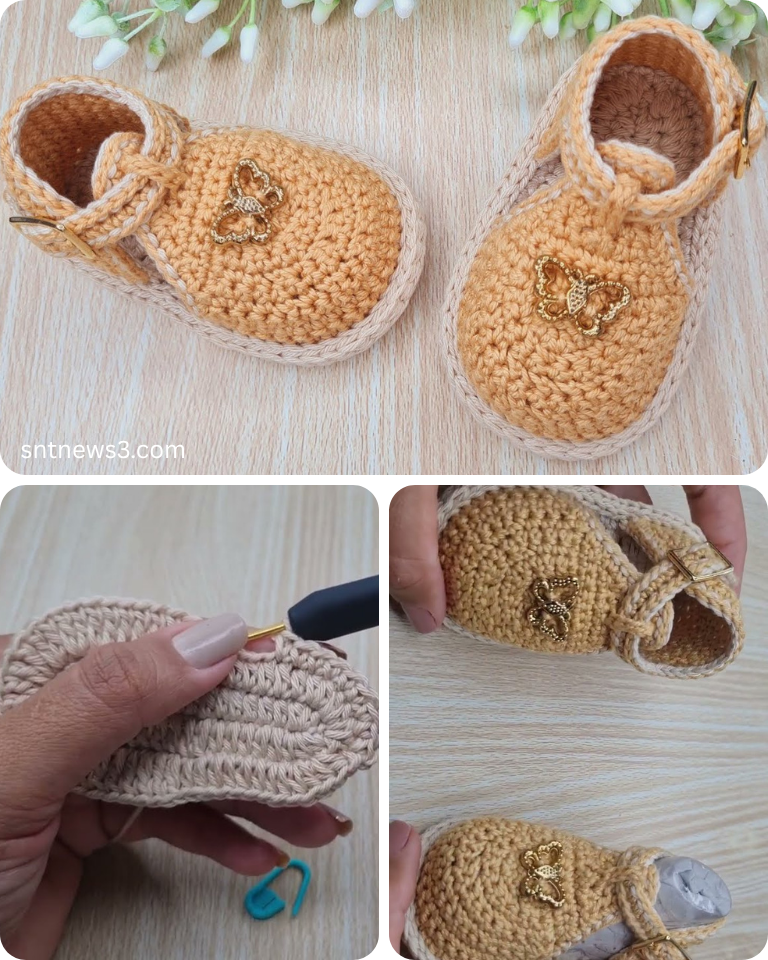
by There’s nothing quite as precious as a pair of handmade booties warming tiny baby feet. The “Honey Baby Booties” are designed to be utterly adorable, evoking the cozy warmth of a beehive, and crafted with a texture that’s as soft as can be. This detailed tutorial focuses on creating a pair specifically sized for newborns to 3-month-olds, with a finished sole length of approximately 9 cm (3.5 inches). They are easy enough for a beginner to tackle, yet charming enough to be a cherished gift.
We’ll use a combination of simple stitches to create a comfortable, well-fitting bootie, with an optional touch of yellow and brown for that classic “honey” theme, though you can choose any color palette that melts your heart!
Why Crochet “Honey Baby Booties”?
- Heartfelt Gift: Handmade baby items are incredibly personal and cherished by new parents.
- Practical & Cozy: Keeps tiny feet warm and snug, essential for infants.
- Beginner-Friendly: Uses basic crochet stitches and techniques, making it approachable for those new to the craft.
- Quick Project: Booties are small, so they work up relatively fast, offering satisfying results.
- Customizable: Easily change colors, add simple embellishments like tiny bees, or adjust the cuff style.
- Skill Building: Practices working in the round, shaping, and basic finishing.
Key Considerations Before You Start:
- Size (Crucial for Baby Booties!):
- This pattern is specifically designed for 9 cm (3.5 inch) soles, typically fitting 1 to 3 month old babies.
- Baby foot sizes can vary, so if possible, measure the baby’s foot. For slightly larger or smaller sizes, you may need to adjust your hook size or yarn weight slightly, or add/remove a round in the sole or sides.
- Average Foot Lengths:
- Newborn: ~7-8 cm (2.75-3.25 inches)
- 1-3 Months: ~9 cm (3.5 inches) – Our Target!
- 3-6 Months: ~10 cm (4 inches)
- 6-12 Months: ~11-12 cm (4.25-4.75 inches)
- Yarn Choice (Softness is King!):
- Fiber: Choose soft, hypoallergenic, and machine-washable yarns. Baby-specific acrylics, superwash merino wool, or soft cotton blends are excellent. Avoid anything scratchy or prone to irritation.
- Weight: DK (Light Worsted / Category 3) is generally ideal for baby booties as it creates a delicate yet warm fabric. If you use Worsted (Category 4), your booties will likely be larger and might require a smaller hook.
- Colors for “Honey” Theme:
- Main Color: Soft yellow, cream, or light beige (for the “honey” look).
- Accent Color: Brown or white (for a stripe or cuff).
- Quantity: Very little! One small skein (approx. 50g/1.7 oz) of your main color should be more than enough for a pair, plus scraps for accents.
- Hook Size:
- Match your hook to your yarn weight, but consider going down half a size to create a denser fabric for structure and warmth.
- For DK yarn: 3.0 mm (US C/2) or 3.25 mm (US D/3) are good starting points.
- Gauge (Important for Sizing!):
- While you might not make a full swatch, being mindful of your tension is crucial for booties. Work a few initial stitches. If your work feels too loose and gappy, go down a hook size. If it’s too stiff, go up. Consistent tension will ensure the booties match in size.

Materials You’ll Need:
- Yarn:
- Main Color (e.g., Yellow): Approx. 30-40 yards of DK (Category 3) yarn.
- Accent Color (e.g., Brown or Cream): Small amount (10-15 yards) of DK yarn.
- Crochet Hook: 3.25 mm (US D/3) or 3.0 mm (US C/2) – adjust for gauge to achieve 9 cm sole.
- Yarn Needle (Tapestry Needle): For weaving in ends.
- Scissors: For cutting yarn.
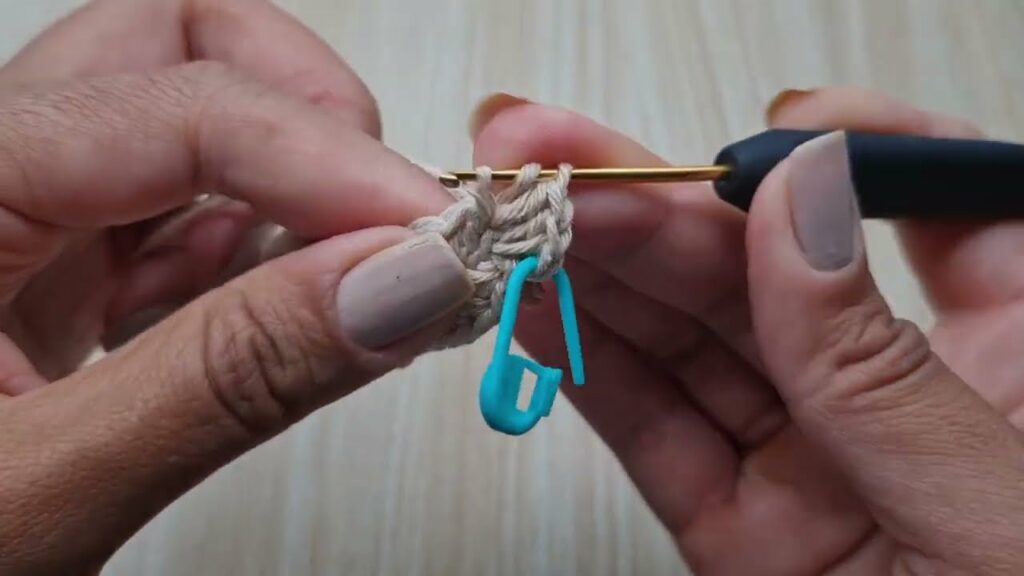
- Stitch Marker (optional): Helpful for marking the beginning of rounds.
Essential Crochet Abbreviations:
- ch: chain
- sl st: slip stitch
- sc: single crochet
- hdc: half double crochet
- dc: double crochet
- inc: increase (e.g., 2 sc in one st)
- sc2tog: single crochet 2 together (decrease)
- hdc2tog: half double crochet 2 together (decrease)
- st(s): stitch(es)
- BLO: back loop only
- FLO: front loop only
- (): indicates instructions to be worked into the same stitch/space
- ***…***: repeat instructions within asterisks
- [ ]: indicates stitch counts at the end of a round/row
Crochet “Honey Baby Booties” Pattern (9 cm / 1-3 Months)
This pattern is worked in continuous rounds for the sole and body, and then the toe is shaped, followed by the cuff.
Part 1: The Sole (Main Color)
We’ll start with an oval base, working around a starting chain.
- Starting Chain: Using your Main Color, ch 11.
- Round 1:
- Sc in the 2nd ch from hook. Sc in each of the next 8 ch.
- Work 3 sc in the last ch (this forms the curve for the toe end).
- Now, working along the opposite side of the starting chain: Sc in each of the next 8 ch.
- Work 2 sc in the last ch (the same ch as your very first sc – this forms the curve for the heel end).
- Join with a sl st to the first sc of the round.
- [22 sc]
- Round 2:
- Ch 1 (does NOT count as a st). Sc inc in the first st. Sc in the next 8 sts.
- Sc inc in the next 3 sts. Sc in the next 8 sts. Sc inc in the next 2 sts.
- Join with a sl st to the first sc.
- [28 sc]
- Round 3:
- Ch 1. Sc in the first st. Sc inc in the next st. Sc in the next 8 sts.
- (Sc inc in next st, sc in next st) 3 times. Sc in the next 8 sts. (Sc inc in next st, sc in next st) 2 times.
- Join with a sl st to the first sc.
- [34 sc]
- Check Sole Length: Your sole should now measure approximately 9 cm (3.5 inches) from toe to heel. Adjust your hook size or add/remove a final sc round here if needed to achieve this length.
Part 2: The Sides of the Bootie (Main Color)
This section builds the wall of the bootie.
- Round 4 (Establishing Wall):
- Ch 1 (does NOT count as a st). Sc in the back loop only (BLO) of each st around.
- Join with a sl st to the first sc.
- [34 sc]
- Working in the BLO for this round creates a neat, defined edge where the sole transitions to the upper.
- Rounds 5 – 6 (Building Height):
- Ch 1. Sc in both loops of each st around.
- Join with a sl st to the first sc.
- [34 sc]
- Repeat Round 5 for a total of 2 rounds.
Part 3: Shaping the Toe (Main Color)
We’ll decrease stitches at the front to form the toe.
- Round 7 (Toe Decrease 1):
- Ch 1 (does NOT count as a st). Sc in the first 8 sts.
- (Hdc2tog) 6 times. (This forms the shaping at the front).
- Sc in the remaining 14 sts.
- Join with a sl st to the first sc.
- [28 sc/hdc]
- Round 8 (Toe Decrease 2):
- Ch 1. Sc in the first 8 sts.
- (Hdc2tog) 3 times.
- Sc in the remaining 14 sts.
- Join with a sl st to the first sc.
- [25 sc/hdc]
Part 4: The Ankle/Cuff (Accent Color or Main Color)
This forms the opening of the bootie and the decorative “honeycomb” cuff.
- Attach Accent Color (or continue with Main Color): Fasten off Main Color. Attach Accent Color with a sl st to any stitch at the back/heel of the bootie.
- Round 9 (Establishing Cuff):
- Ch 1 (does NOT count as a st). Sc in each st around.
- Join with a sl st to the first sc.
- [25 sc]
- Round 10 (Honeycomb Look – Optional Pattern):
- Ch 2 (does NOT count as a st). Hdc in the first st.
- Work 1 dc in the next st (this is worked in the front loop of the sc from the row below). Work 1 hdc in the next st.
- Repeat from * to * around. (You’ll be alternating dc in FLO of st below, and hdc in regular st).
- Join with a sl st to the first hdc.
- [25 hdc/dc]
- This creates a subtle textured effect, somewhat like a honeycomb.
- Round 11 (Top Edge):
- Ch 1. Sc in each st around.
- Join with a sl st to the first sc.
- [25 sc]
- Fasten off Accent Color.
Part 5: Finishing Touches
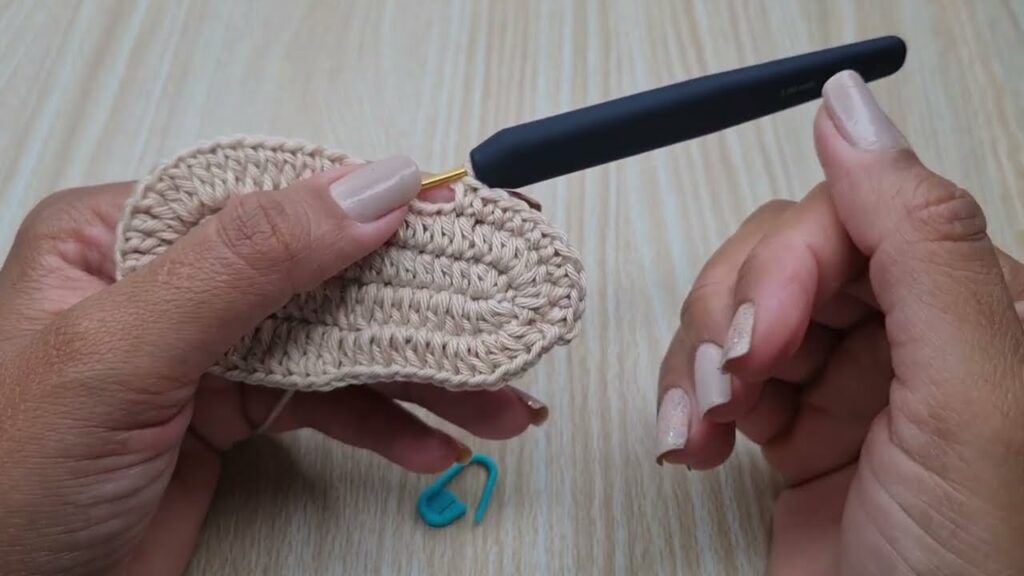
- Weave in All Ends: Use your yarn needle to neatly weave in all starting and ending tails from the sole, body, and cuff. Take your time to make them invisible.
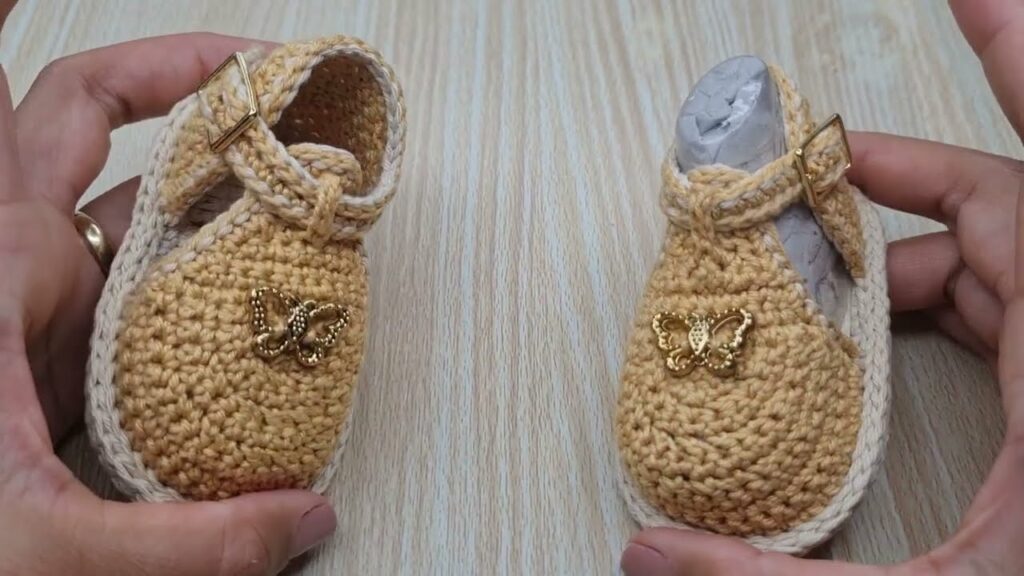
- Make a Second Bootie! Repeat all steps to create a matching pair.
- Optional: Add a “Honey Drip” (Surface Crochet):
- Using your Accent Color (or a slightly darker yellow/orange), surface slip stitch a few “drips” randomly down the side of the bootie. This adds a whimsical touch.
- Optional: Tiny Bee Embellishment:
- Crochet or embroider a tiny bee onto the side of the bootie or the cuff. (A very simple bee can be a few sl sts in black yarn, with tiny chain loops for wings).
Congratulations! Your Sweet “Honey Baby Booties” are Complete!
These little booties are not just practical; they are a heartfelt expression of love, ready to warm tiny feet and bring smiles.
Tips for Success & Customization:
- Consistency is Key: Try to maintain an even tension throughout both booties so they match in size and shape.
- Stitch Markers: Use a stitch marker to mark the first stitch of each round, especially when working in continuous rounds, to avoid losing your place.
- Adjusting Size:
- Slightly Smaller: Go down a hook size (e.g., 3.0 mm).
- Slightly Larger: Go up a hook size (e.g., 3.5 mm).
- Adding Length: Add an extra repeat round (e.g., another Round 3 for the sole, or another Round 5 for the body) before starting decreases. Be mindful that adding rounds will also add circumference.
- Cuff Variations:
- For a simpler cuff, just do several rounds of sc or hdc.
- For a ribbed cuff, alternate front post and back post stitches (e.g., hdc FP/BP) for a few rounds.
- Decorations: Besides bees, you could add small bows, embroidered flowers, or buttons (ensure they are very securely sewn on for safety).
- Care: Always refer to your yarn label for specific washing instructions. Most baby-friendly yarns are machine washable and dryable, which is perfect for parents.
Enjoy the delightful process of creating these charming “Honey Baby Booties” – they are sure to be a sweet success!
Video tutorial: