 by
by Quick overview
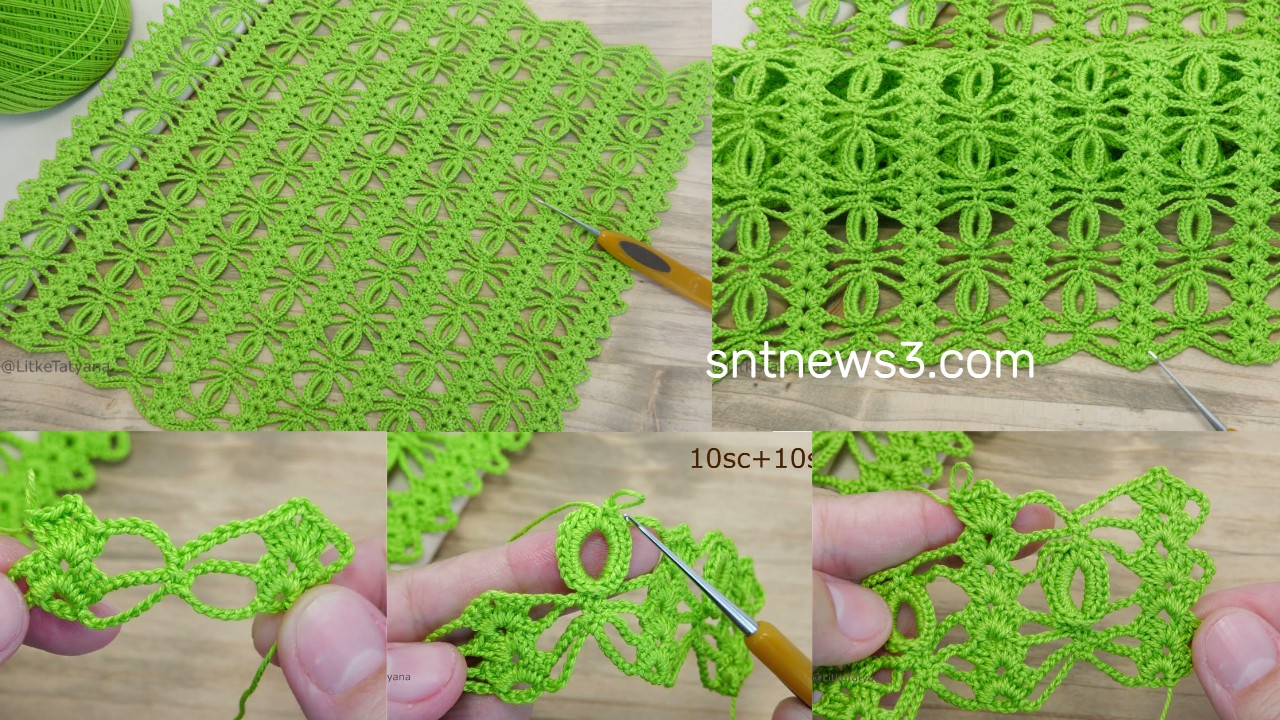
- Type: easy lacy repeat suitable for beginners
- Use: scarves, shawls, blouse panels, runners, edging
- Repeat: worked in a small horizontal repeat (fans + chain arches)
- Main idea: a two-row repeat — a fan row (5-dc shells) and an arch/V row (chain arches + V-sts) — very memorisable.
Materials
- Yarn: sport/DK cotton or light worsted (or any yarn you like)
- Hook: 3.0–4.5 mm (match to yarn; 3.5 mm is a good default)
- Tapestry needle, scissors, blocking pins, measuring tape
- Abbreviations (US): ch, sc, dc, hdc, tr (treble), sl st, sp, st, rep
Stitch multiple
Work foundation chain in multiples of 8 + 1.
Example practice chain: ch 33 (8×4 = 32 + 1)
Gauge & sample
Gauge isn’t critical for this decorative stitch, but make a small swatch to check drape.
Example swatch (DK + 3.5 mm):
- Foundation: ch 33
- Work 10 repeats (20 rows) — after blocking the sample might be roughly 10 × 10 cm depending on yarn/hook.
The pattern — full step-by-step
Foundation
Chain a multiple of 8 + 1 (for example ch 33).
Row 0 — base row (optional tidy base)
Work a neat base row so edges are stable:
- Row 0: dc in the 4th ch from hook (counts as dc), dc in each ch across. Turn.
(Alternative: sc across for a firmer edge.)
Row 1 — Fan row (shells)
This row lays a series of shells (fans) that become the main decorative element.
- ch 3 (counts as dc), dc in next dc (so you begin with a pair of dc).
- Skip next dc, 5 dc into the next ch-space (or into the ch-1 gap from Row 0), skip next dc, dc in next 2 dc.
- Repeat * across the row. End with dc in the top of turning ch. Turn.
Notes:
- If you used dc across foundation, the fans go into the ch-1 gaps you created by skipping — if you used sc base, put fans into the spaces between dc groups.
- The 5-dc shell is the classic fan; you can use 3-dc for a subtler fan if you prefer.
Row 2 — Arch + V-st row (spacer row)
This row creates arches and V-stitches that sit between the fans and set up the next fan row.
- ch 3 (counts as dc), dc in next dc.
- ch 3, sk the shell below, V-st (dc, ch 1, dc) into the center dc of the 5-dc shell (middle stitch of the 5-dc group), ch 3, dc in next 2 dc.
- Repeat * across. End with dc in the top of turning ch. Turn.
Notes:
- The V-st placed in the center of the shell gives the pattern a nice vertical rhythm.
- The ch-3 arches create the lacy gaps.
Repeat
Now simply repeat Row 1 → Row 2 for the length you want.
So sequence is:
Row 1: fan (5 dc shells)
Row 2: arch + V-st
Repeat Rows 1–2
That’s the whole pattern — very simple and easy to memorise.
Worked example (explicit rows using ch 33)
- Chain 33.
- Row 0: dc in 4th ch from hook and in each ch across. Turn.
- Row 1: ch3, dc in next dc; skip next dc, 5 dc in next sp, skip next dc, dc in next 2 dc — repeat to end. Turn.
- Row 2: ch3, dc in next dc; ch3, V-st (dc, ch1, dc) into middle dc of the 5-dc shell below, ch3, dc in next 2 dc — repeat. Turn.
- Repeat Rows 1–2 until desired length. Fasten off and weave ends.
Edging and finishing
- For a neat border, work 2 rounds after the last pattern row:
- Round A: sc evenly around the piece, placing 3 sc in each corner (if rectangular) or 3 sc in each end shell. Join.
- Round B: skip 2 sc, 5 dc in next sc (shell), skip 2 sc, sc in next sc — repeat for a scalloped finish. Join and weave ends. Block to open the lace.
- For fashion pieces (blouse/shawl) add a single-crochet or picot edge at neck/armholes.
How to scale for common projects
Scarf / Shawl
- Chain desired width in multiples of 8 + 1. Work Rows 1–2 repeatedly until desired length. Add scalloped ends if you like.
Blouse / Tunic panel (two rectangles)
- Make two identical rectangular panels using the pattern. Block them. Sew shoulder seams (leave neck opening) and side seams leaving armhole openings. Add sc edging around neck and armholes.
- Width: measure half-chest + ease, convert to stitches (use your swatch to calculate stitches/inch).
Runner / Table runner
- Use cotton and a slightly smaller hook for a crisper runner. Chain runner width (multiple 8 + 1), repeat Rows 1–2 until required length. Finish with scallop border.
Variations & small tweaks
- Subtle fan: use 3 dc instead of 5 dc for a smaller fan.
- Airier look: change ch-3 arches to ch-4 (Row 2) for larger openings.
- Denser look: substitute hdc for the dc pairs at row starts/ends.
- Taller fans: use 7 dc per fan for a bolder texture.
- Color change: change color every 4–6 rows for stripes; carry color up the sides or weave in tails.
Tips & troubleshooting
- If edges pull or ripple: add a foundation sc row (Row 0) as above and make sure you work the beginning ch-3 + dc pair to stabilize edges. Blocking also helps.
- Fans not centered? Always place the V-st into the center dc of a 5-dc shell below — count carefully until you’re comfortable.
- Fabric too loose? Use a smaller hook or fewer chains in the arch (reduce ch-3 to ch-2).
- Fabric too stiff? Use a larger hook or a softer yarn (bamboo/cotton blends drape well).
Quick cheat-sheet (one-line)
- Repeat (memorize this):
Row A (fans): skip 1, 5 dc in sp, skip 1, dc in next 2 dc
Row B (arches): ch3, V-st into center dc of fan below, ch3, dc in next 2 dc
Repeat A → B → A → B…